Setting the project for marking and reading the marking time
Using the marking preview, we set the position of the conveyor slot in the marking area.
Introduction
In the previous video, using the marking preview, we set the position of the conveyor slot in the marking area.
File setting
The rectangle we created in EZCAD now shows the dimensions of the slot, or part of it, inside which we can now set the file for automatic marking.
Import the graphics to be marked into EZCAD by clicking on the following options in the top bar: File -> Import Vector file -> and then selecting the file and clicking -> Import. After importing the graphic, make sure that the dimensions displayed on the left side of the program window match the expected ones.
Position setting
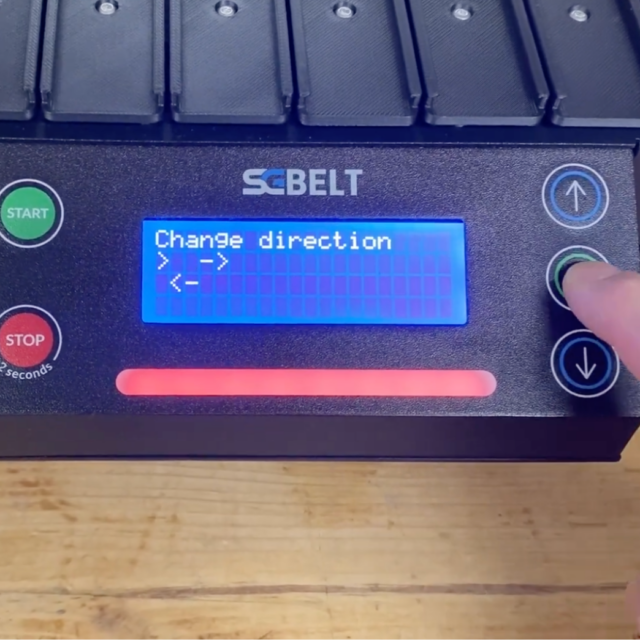
Now insert the pen into the socket. Adjust the height of the laser head to its surface. Deselect the graphic and the rectangle you created earlier, then click F1 Red (Beam) at the bottom of the screen. The laser will display two red dots. Adjust the height of the head so that the two dots merge into one on the surface of the pen. If the laser displays dots outside the pen surface, in the conveyor menu, go to Settings -> Move and use the arrows to move the conveyor slot so that the height dots are in the centre of the pen. Once the height is set, remove the pen from the slot, go to Settings -> Auto Center, and click OK. The conveyor will automatically position itself in the centre of the slot. Once the conveyor has set the centre, we can place the pen in the socket again.
We can already set the graphics in relation to the pen. Using the preview option of the marking device, select the graphic and click F1 (Red) at the bottom of the screen and the laser will show the position of the graphic in relation to the item being marked. Using the arrows on the keyboard or moving the project in the program with the preview turned off, we will position the graphic in relation to the pen, preparing it for the first marking.
Once you have set the position of the graphic on the item, add a fill using the Hatch option and the previously tested marking parameters of the material of your workpiece.
Now we are ready to perform the first marking. Make sure you follow the safety rules and wear safety glasses for the time of marking. Perform one test marking manually by selecting the graphic and clicking the F2 (Mark) button at the bottom of the screen. After the marking process is complete, the programs will display the exact time of marking, which we will enter into the conveyor driver in the next step.
Now the conveyor, the marking machine and the graphics you have imported are set for automatic marking using the SGBELT conveyor.

You might also be interested in this...


